In this article
- How ArduPilot's Position Hold mode replaces manual hover correction for new FPV pilots.
- When and how Return-to-Home activates — signal loss, low battery, or pilot request.
- Stabilised (Stabilize) vs Altitude Hold vs Loiter: which mode to learn first.
- Why open-source firmware makes safety features transparent and continuously improved.
- How the new MemAero Aero 2 (5-inch) and Aero 3 (7-inch) are built around these principles.
- UK airspace rules that interact with your drone's safety systems (100g registration threshold).
Why safety systems matter for FPV pilots
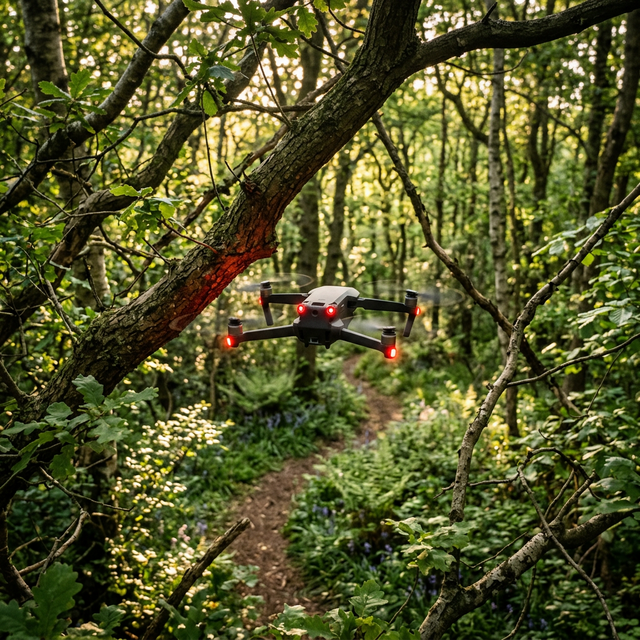
FPV drones are fundamentally different from autonomous camera drones. You are in the seat — feeling every gust through the sticks, making split-second corrections, and learning to read your aircraft's behaviour in real time. That is what makes FPV rewarding. It is also what makes good safety architecture essential for anyone who is still building that skill.
The Aero 3 Lite was a budget GPS drone with basic crash-prevention features. It has been discontinued. MemAero now designs and builds proper FPV drones — the Aero 2 (5-inch freestyle) and the Aero 3 (7-inch long-range) — both running open ArduPilot firmware on licensed hardware built in Lancaster. The safety philosophy has evolved considerably. Rather than a closed black box, ArduPilot gives you transparency into every safety system on board.
ArduPilot Position Hold: the first line of crash prevention
Position Hold (Loiter mode in ArduPilot) is the feature that gives new FPV pilots the breathing room to look around, reorient, and plan their next move without the aircraft drifting into a hedge. Using GPS and the onboard IMU together, the flight controller continuously samples its position and applies micro-corrections to the motors to maintain a fixed point in 3D space.
Critically, this is not the same as a toy drone's "GPS hold" — ArduPilot's implementation is configurable. You can tune the loiter speed, the aggressiveness of position correction, and the pilot-override sensitivity to match your flying style. As you gain confidence, you transition to Altitude Hold, then Stabilize, progressively reducing the automation and building the manual control skills that define proper FPV flying.
For a deeper look at why open firmware matters, see our guide on why FPV drones should run ArduPilot.
Return-to-Home: how it works and when it saves you
Return-to-Home (RTH) is the safety net every pilot hopes never to need — and the feature that most reliably prevents lost aircraft. ArduPilot's RTH activates in three scenarios: manual trigger (a dedicated switch on your transmitter), signal failsafe (if the RC link drops for a configured duration), and battery failsafe (when voltage drops to a defined critical level).
On activation, the drone climbs to a pre-set return altitude — high enough to clear local obstacles — then navigates back to its recorded home point and descends. The home point is set automatically at the GPS lock achieved before takeoff, which is why waiting for a solid fix before lifting off is non-negotiable.
ArduPilot also supports a terrain-following RTH mode, which uses a digital elevation model to avoid hillsides during the return leg — particularly relevant for long-range flying with the Aero 3 in the UK's varied landscape. This level of sophistication is simply not available in closed-source budget drones.
Stabilised flight modes: what each one does
ArduPilot offers a ladder of flight modes, each removing a different layer of automation. Understanding the progression is essential for safe skill development.
- Stabilize — the flight controller levels the aircraft and corrects attitude, but you control throttle and horizontal movement entirely. This is the mode experienced FPV pilots use for freestyle — maximum responsiveness, no position holding. Not recommended for beginners as the only mode.
- Altitude Hold — adds automatic altitude maintenance to Stabilize. The drone holds its height while you control direction and heading. A good intermediate step.
- Loiter (Position Hold) — GPS-assisted position hold in all three axes. The aircraft stays where you leave it. Ideal for learning orientation, planning shots, and building confidence.
- Auto — follows a pre-planned waypoint mission. Useful for survey work and cinematic passes with the Aero 3.
The ability to set a mode switch on your transmitter that flips between Loiter and Stabilize means you can start a flight in Position Hold, practice your freestyle moves in Stabilize, and recover cleanly if things get unsettled — all without landing.
Battery and signal failsafes
Two failure modes end more flights than any single pilot error: a depleted battery and a lost RC link. ArduPilot handles both with configurable failsafe logic.
The battery failsafe monitors cell voltage (not just total pack voltage), so it catches early cell sag before it becomes an unrecoverable dive. You configure a warning threshold and a critical threshold independently — the warning can trigger a land-immediately command, the critical can trigger RTH. This two-stage approach gives you time to react rather than a sudden loss of power.
The RC failsafe activates when the receiver stops receiving valid packets for a defined period (typically 1–2 seconds). The response — hold position, RTH, or land — is configurable per aircraft and use case. For a long-range flight with the Aero 3, RTH is the sensible default. For a tight indoor freestyle session, land-immediately makes more sense.
UK airspace and your safety systems
Under current UK drone regulations, any drone over 100g requires registration with the CAA. Both the Aero 2 and Aero 3 exceed this threshold — they are serious, capable aircraft, not toy quadcopters. Registering as an operator takes roughly 20 minutes and costs a small annual fee; you must also pass the online theory test to fly in category A1/A3.
ArduPilot's geofencing feature allows you to set a maximum altitude (400ft AGL is the standard UK limit), a maximum radius from home, and a return action when either boundary is approached. This is not a substitute for reading the rules — see our guide on whether FPV drones are legal in the UK — but it is a useful additional safeguard that keeps your flying within permitted parameters automatically.
What this means for the MemAero Aero 2 and Aero 3
The Aero 3 Lite's crash-prevention story was built on closed sensors and proprietary firmware. The Aero 2 and Aero 3 take a different approach: open ArduPilot firmware, full parameter access via Mission Planner or QGroundControl, and hardware designed to be repaired rather than replaced.
The Aero 2 is a 5-inch freestyle platform — beginner-friendly in its ArduPilot tuning, with enough responsiveness to grow into. The Aero 3 is a 7-inch long-range aircraft for creators and explorers, with the range and flight time where the battery failsafe and RTH genuinely earn their keep. Both carry the same sealed slide-in smart battery and DJI O4 digital video system.
Both drones are currently in pre-launch. If the safety-first approach to proper FPV appeals to you, the waitlist is the right next step.
MemAero has moved to UK-made FPV
The Aero 2 and Aero 3 are designed and built in Lancaster — programmable, repairable, and ownable. Founders pricing and a free spare battery for waitlist members.
Join the waitlist →How do ArduPilot's safety features prevent FPV drone crashes?
ArduPilot uses a combination of Position Hold (GPS + IMU), configurable failsafes for battery and signal loss, and Return-to-Home logic to keep the aircraft under control when things go wrong. The key advantage over closed firmware is that every parameter is transparent and adjustable — you can tune the sensitivity to match your skill level.
What is Return-to-Home and when does it activate?
Return-to-Home (RTH) navigates the drone back to its takeoff point automatically. It activates on manual trigger (a transmitter switch), RC signal loss (configurable failsafe), or low battery. The drone climbs to a pre-set safe altitude, returns to its recorded home point, and lands.
Which flight mode should a beginner start with on an ArduPilot FPV drone?
Loiter (Position Hold) is the safest starting point — the aircraft holds its GPS position while you learn orientation and stick control. As confidence builds, progress to Altitude Hold, then Stabilize for full manual-style FPV flying. Most ArduPilot drones allow you to assign all three to a transmitter switch so you can move between them in flight.