
Aero 1 Lite Maintenance: Flight-Ready Tips & Guide
In This Article
- Regular Aero 1 Lite maintenance improves safety, lifespan, and performance.
- Inspect propellers, structural components, and connections before every flight.
- Clean your drone using non-abrasive tools and electronics-safe solutions.
- Follow battery care rules for charging, storage, and disposal.
- Use checklists to maintain consistent maintenance routines.
- Adapt your care strategy for each season’s hazards and climate challenges.
- Know when to replace parts, especially critical systems like motors and batteries.
- Keep maintenance logs and invest in high-quality tools and accessories.
Why Aero 1 Lite Maintenance Is Critical Before Every Flight
Start with Safety First
Conducting routine Aero 1 Lite maintenance before each flight is vital, not just for performance, but also for safety. Neglecting even minor issues can lead to malfunctions mid-flight, risking injury, property damage, or complete loss of the aircraft. By following a structured maintenance strategy, operators can detect early signs of wear, ensure compliance with local aviation regulations, and ultimately extend the product lifecycle. Regular maintenance routines are an investment in both drone longevity and operational excellence.
How to Inspect Your Drone Before Takeoff
Check Propellers, Frame, and Connections
A thorough visual inspection of your Aero 1 Lite should begin with the rotors. Check for nicks, warping, or cracking along the blades. Irregularities in the propellers can cause vibrations and instability. Replace any damaged blades immediately with the correct manufacturer-approved parts to ensure optimal aerodynamics.
Continue your inspection with the drone’s airframe. Look for signs of structural stress or loose fitting panels. Examine the arms and landing gear for cracks or wear. If your drone has encountered any minor crashes or heavy landings, these parts are especially vulnerable.
Don’t overlook electronic connections. Confirm that all data ports and cable points—especially those linking the camera, GPS unit, and flight controller—are clean and firmly attached. Loose wires can lead to in-flight communication disruptions and hazardous outcomes.
"Pre-flight inspection is your first defence against failure mid-air. A three-minute check can save a thousand-pound drone."
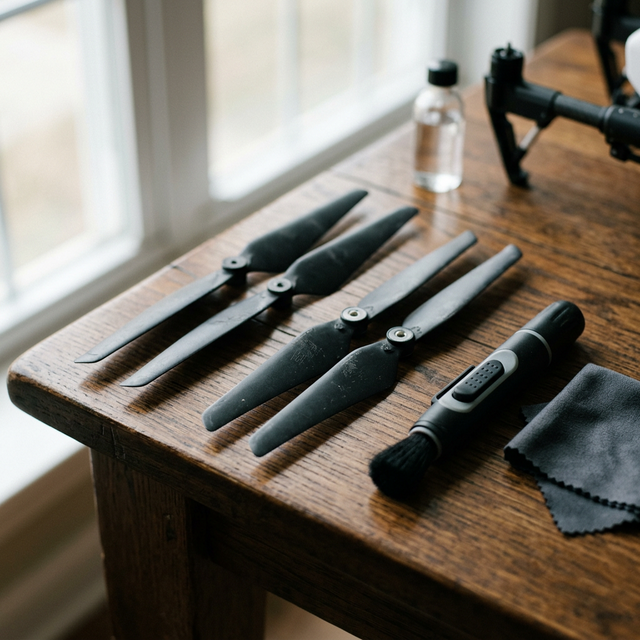
Cleaning the Aero 1 Lite Without Damage
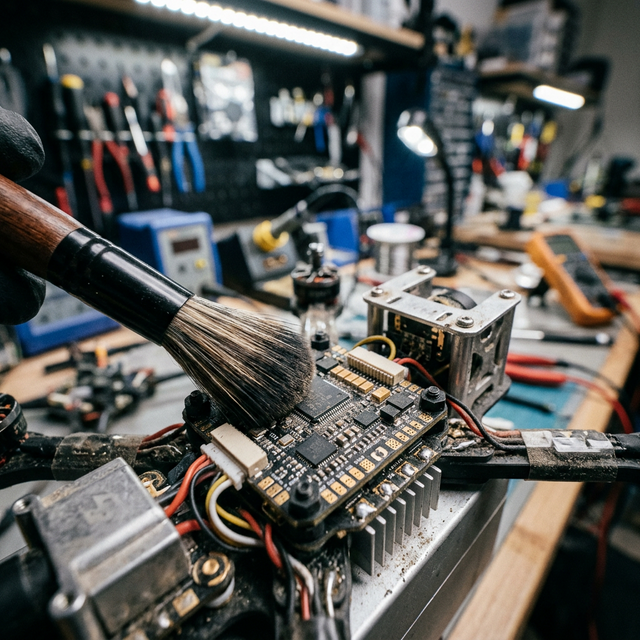
Keeping your drone clean is essential for smooth operations. For the Aero 1 Lite, always power off the device and remove the battery before cleaning. Use a soft-bristle brush or compressed air to remove dust and debris from motors and vents. Avoid using high-pressure air, as it can force particles deeper into the components.
Wipe the exterior using a microfiber cloth dampened with distilled water or an alcohol-free electronics-safe cleaning solution. Never use standard household cleaners—they often contain chemicals that may corrode sensitive surfaces.
If your camera lens or sensors have accumulated grime, gently clean them with lens wipes. Be extremely cautious with gimbals and optical elements. A cotton bud moistened with isopropyl alcohol (90%) can handle stubborn spots, but avoid overuse to prevent streaks.
Dry all parts thoroughly before powering the drone back on, and don’t attempt cleaning under wet or humid conditions. Moisture can bridge electrical contacts and cause short circuits.
Drone Battery Care and Charging Tips
The Aero 1 Lite’s lithium polymer (LiPo) battery is a high-performance component requiring consistent oversight. Always inspect the battery casing before charging. Swelling, leakage, or an unusually hot surface indicate the need for replacement. Never attempt to recharge a compromised battery.
Use the official Aero 1 Lite charger and follow the manufacturer’s guidelines precisely. Overcharging or fast charging using substandard cables can significantly reduce battery lifespan. Charge batteries on a non-flammable surface, away from direct sunlight and moisture. A battery charging bag can provide additional safety during use.
Always store charged batteries at 50-60% capacity if not being used for longer than 48 hours. Fully charged storage may degrade efficiency, while near-zero charge can trigger permanent damage due to over-discharge protection circuits.
Regularly calibrate battery levels by fully charging and discharging (through flight) every 15–20 cycles. Keeping track of charge cycles helps monitor battery health, ensuring reliable power delivery mid-air.
Storage and Transport Best Practices
How and where you store your Aero 1 Lite can directly impact its operational readiness. Ideally, always store your drone in a climate-controlled environment. Avoid extreme cold or heat, which can affect the drone’s plastics, circuitry, and battery chemistry. Temperatures between 15°C and 25°C are optimal.
Use a custom-moulded hard case with padded compartments for transporting your Aero 1 Lite. These not only protect the device from physical shocks but also help keep dust and moisture away. While transporting, ensure that the propellers are detached or securely locked into place to prevent unnecessary stress on the motors.
Desiccant packets inside the case can guard against humidity during long trips. For extended periods of storage, remove the battery entirely and store it separately in a fireproof battery container. Additionally, cover camera lenses and sensor points to protect them from dust accumulation and scratches.
Recommended Tools for Maintenance Success
Investing in a good set of maintenance tools facilitates faster, safer check-ups. Essential tools include a precision screwdriver set, anti-static tweezers, a soft brush, and canned air. For in-depth repairs, soldering kits and multimetres are useful, particularly for diagnosing faulty wiring or voltage discrepancies.
LED magnifiers or headlamps improve visibility during internal checks. A high-quality calibration mat helps ensure symmetrical analysis during propeller and gimbal adjustments. It's also worth investing in drone-specific cleaning kits designed not to react chemically with delicate components.
Maintain a maintenance logbook as part of your toolkit. Document last inspection dates, component swap-outs, firmware updates, and battery cycles. Not only does this improve accountability, but it also helps identify patterns that could indicate recurring technical issues.
Common Issues & How to Prevent Them
Among the most frequently reported problems with the Aero 1 Lite are propeller misalignments, motor overheating, gimbal calibration faults, and signal interference. Fortunately, most of these can be prevented with vigilant Aero 1 Lite maintenance.
Vibrations caused by uneven propeller wear can disrupt flight stabilisation. Checking propeller balance using a balancing tool can prevent vibration-related issues. Motor fatigue typically arises from dust buildup or prolonged flights beyond recommended limits. Avoid flying during dusty or rainy days and inspect the cooling vents regularly.
As for gimbal errors, these often result from minor knocks or improper storage. Calibrate the gimbal via the companion app after any physical impact, and always lock the gimbal when transporting the drone.
Signal interference is another key concern. Avoid flying near metal structures or densely populated wi-fi zones. Updating firmware frequently can also resolve hidden bugs that may disrupt signal integrity. For more advice on error-resolution protocols, refer to Learn more about Drone Maintenance and Flight Readiness.
Seasonal Maintenance Tips for All-Year Readiness
Each season presents unique challenges in maintaining your Aero 1 Lite. During winter, always warm the battery indoors prior to flight, and limit time in sub-zero temperatures to avoid reduced battery performance. Moisture from snow can corrode circuitry; consider using a weatherproof skin to shield the drone.
In summer, avoid peak sunshine hours to prevent battery overheating. Let your drone cool down between flights and monitor battery temperature using the app. Also, inspect propellers if flying through bugs or plant debris is common in your area.
Autumn introduces falling leaves, which can interfere with moving parts. Clean motor housings regularly and increase pre-flight visual inspections. Spring pollen may affect sensors and gimbals, so use sensor-safe wipes more often during this period.
Regardless of the season, always update the Aero 1 Lite firmware before a flight. Seasonal firmware updates often address environmental stability or flying condition improvements. For weather-specific accessories, check out Essential maintenance actions for drones.
When to Replace Parts on the Aero 1 Lite
Understanding the right time to replace parts can prevent critical flight failures. Propellers should be replaced every 100 flights or if there is any visible deformity. Always use OEM (original equipment manufacturer) propellers to guarantee balance and performance.
Batteries should be replaced after 250–300 cycles, or sooner if there are signs of charging irregularities or flight time reductions. A voltage variance of over 0.1V between cells is a strong indicator of battery fatigue.
Gimbal and motor replacements are less frequent but essential if control responsiveness declines or if strange noises persist post-calibration. Replacement cycles should be noted in your maintenance journal to support risk forecasting.
The bearing systems of motors may wear over time, causing friction and heat. If you notice persistent high temperatures after short flights, even in mild conditions, consult the diagnostics app and consider replacing the motor unit. For guidance on compatibility, see Read a related article.
Using Checklists to Stay on Track
Consistent Aero 1 Lite maintenance starts with incorporating checklists into your pre- and post-flight routine. A well-structured list ensures no critical step is overlooked, particularly if you're flying frequently or under varying environmental conditions.
Your checklist should include: visual inspection of structural elements, battery voltage check, firmware version confirmation, propeller evaluation, gimbal calibration, ESC (electronic speed controller) test, GPS signal confirmation, and radio link stability test.
Post-flight checklists are equally important. Note component temperatures, inspect for debris, analyse flight logs for errors, and recharge batteries only after cooling down. Having both paper and digital copies of your checklist can help ensure continuity even in off-grid situations. Standardising this habit elevates personal responsibility and improves long-term hardware integrity.
Conclusion: Keep Your Drone Airworthy With Regular Care
Great guide on aero-1-lite-maintenance-flight-ready-guide – Community Feedback
How often should I check my Aero 1 Lite for maintenance?
Check your Aero 1 Lite before every flight for visible damage, battery status, and propeller condition. Perform a deeper clean and system check after every 5 to 10 hours of flight time.
What cleaning products are safe for my Aero 1 Lite?
Use a soft microfiber cloth for surfaces and compressed air for small components. Avoid harsh chemicals; a little isopropyl alcohol on a cotton bud works for tough spots. Always keep moisture away from electronics.
How can I extend my Aero 1 Lite’s battery life?
Charge batteries fully before storage, avoid discharging below 20%, and store in a cool, dry place. Rotate usage if you have spares and avoid charging immediately after flying or when batteries are hot.