
Aero 1 Lite: Easy Setup Guide for Parents & Teens Interactive
In This Article
- Begin your aero 1 lite setup by charging and pairing devices properly.
- Calibrate sensors before every significant flight session.
- Use Beginner Mode and safe zones for initial learning experiences.
- Equip yourself with recommended extras like spare batteries and flight goggles.
- Continue learning via community forums and family-friendly drone groups.
The Aero 1 Lite setup is an essential step for any parent-teen duo looking to explore the skies together. This comprehensive guide provides expert insights, step-by-step instructions, and safety recommendations for a seamless experience. Discover what makes the Aero 1 Lite an ideal entry point into the world of family-friendly drone piloting.
Why Choose the Aero 1 Lite for Families
Accessible Design for First-Time Flyers
The Aero 1 Lite setup has been engineered with families in mind, particularly catering to those experiencing drone flying for the very first time. Its intuitive design simplifies every aspect of piloting, from initial placement to full takeoff. The lightweight frame ensures that even younger users can handle the device with minimal strain. Additionally, its durable materials provide peace of mind for parents who might worry about crash landings or accidental bumps. The Aero 1 Lite doesn’t just offer functionality—it provides a shared learning experience that strengthens family bonds while introducing teens to the exciting world of flight. Moreover, the Aero 1 Lite blends performance with simplicity. Unlike many advanced drones that require extensive calibration knowledge or technical equipment, this model comes nearly ready to fly straight out of the box. Families love it not just for its approachable learning curve, but for the way it transforms flying into a social, engaging activity. The control system is easy to master, and flight stability software reduces mid-air wobbling, giving new pilots the confidence to fly independently. As the drone industry grows increasingly complex, the Aero 1 Lite stands out as a beacon of accessibility, making it a go-to choice for curious teens and supportive parents.What You Need to Start
Included Components and Extras
In your Aero 1 Lite setup package, you’ll find all the essentials to begin your flight journey right away. Inside the box are the following items: the Aero 1 Lite drone itself, a remote control with a phone mount, a lithium-polymer battery pack, a charging cable, four propeller guards, and an instruction manual. Additionally, replacement propellers are included as backups. Each of these components plays a critical role in giving families a smooth start. It’s important to also check for optional extras provided by your retailer. Some packages offer a padded carrying case, which makes transport to parks or outdoor locations safer and more convenient. A few kits may include additional battery packs, allowing longer flight sessions without the interruption of recharging. Before engaging in the Aero 1 Lite setup, cross-reference the contents list in the manual with what you’ve received to ensure nothing is missing or damaged. Doing so prevents delays later and helps guarantee a safe and seamless launch.Step-by-Step Setup Instructions
Charging, Assembly, and Pairing
Begin your Aero 1 Lite setup by fully charging the provided battery. Use the included USB charging cable and connect it securely to a safe power source. While charging, a red LED light will appear; once charging is complete, that indicator will shut off. Never attempt to fly the drone on a low battery—it may impact sensor functionality and increase the possibility of a crash. Once charged, insert the battery into the dedicated compartment in the rear of the drone body. Snap it in until you hear a solid click. Assemble the propeller guards next, lining them up with the corresponding motor positions. These guards are vital for indoor flight learning, especially when teens are first starting out in tight spaces. Then, power on the quest. Turn on the Aero 1 Lite by pressing its main button until the front lights illuminate. Repeat the process on the remote. Once both devices are powered, pair them by pushing the left joystick up and then down. The LED lights will flash and stabilise once connected. Now, link your smartphone via the official Aero 1 Lite app, available on major app stores. Once connected, you’ll unlock access to camera feeds, flight stats, and journey logs.Calibration Tips for Accurate Flying
How To Align the Sensors
Sensor calibration is a pivotal stage in your Aero 1 Lite setup. An uncalibrated drone may drift, respond sluggishly, or misinterpret environmental data. To initiate the process, place the drone on an absolutely flat and stable surface. Avoid carpets or uneven ground, which can affect sensor alignment. Then, access the calibration menu via the Aero app. Tap on “Gyro Calibrate” and hold the controller flat. The drone’s lights will flash, then remain steady—a sign that the internal gyroscope is aligned. Repeat a similar process for compass calibration. The app will prompt you to rotate your Aero 1 Lite horizontally and then vertically. Follow the visual instructions carefully. Mistakes in this process can lead to flyaways or erratic spinning. Always recalibrate after firmware updates or big geographical shifts. Sensor maintenance is just as important as initial calibration. Inspect your drone regularly for dust build-up, which can interfere with infrared and optical cameras. Store the drone in a clean, dry space, ideally in a case lined with protective foam.Understanding Safe Flight Modes
Beginner and Emergency Features
A major highlight of the Aero 1 Lite setup is its diverse flight modes tailored for safety and learning. The “Beginner Mode” restricts height and range, making it ideal for backyard flying with minimal risk. It keeps the drone within a 30-metre range and reduces speed for easier control. This is especially beneficial when instructing teens who may oversteer or get overwhelmed. “Return to Home” (RTH) is another pivotal feature. With one button, the Aero 1 Lite returns to its launch point automatically. This ensures recovery in case of signal loss or battery depletion. There’s also an “Emergency Halt” function: pressing both joysticks inward simultaneously triggers an immediate engine stop. Use this only when necessary, as it may cause a hard landing. These modes prioritise safety while empowering new pilots with autonomy. Make sure to activate GPS lock before long flights. This function stabilises movement and provides enhanced tracking. You’ll notice improved hover accuracy, especially in breezy outdoor conditions.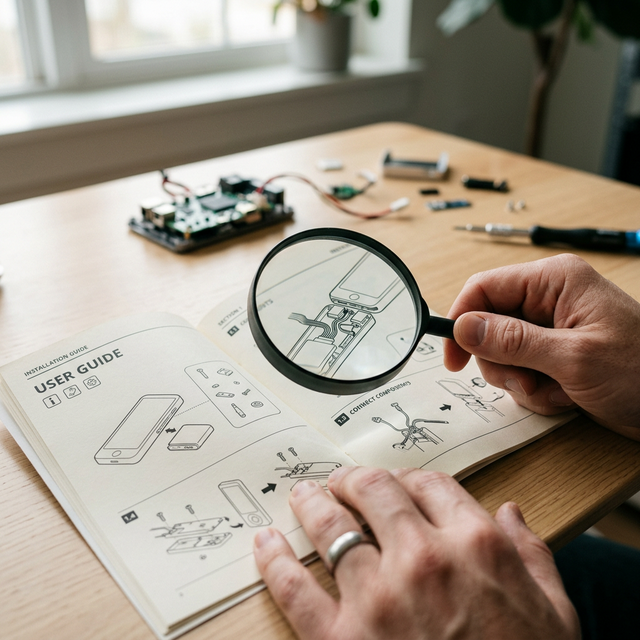
Teaching Teens with Confidence
Tips for Parental Guidance
Parents play a pivotal role during the Aero 1 Lite setup and early flight sessions. Start by setting achievable goals—control takeoff, stable hover, and safe landing. Celebrate small victories to build teen confidence. Refrain from taking over controls unless absolutely necessary; instead, use the remote’s co-pilot function to override only undesirable actions. Always choose safe environments, such as open parks or school fields. Avoid tall trees or power lines. Before beginning, walk the designated area and inspect for potential hazards. Invest time in reviewing drone regulations with your teen, shaping them into responsible digital citizens. You can also encourage your teen to join youth drone interest groups. These communities foster mentorship, discipline, and peer learning. Finally, turn flight sessions into teachable moments. Discuss turbulence, navigation, and even weather systems. These shared experiences build trust and open communication channels between parents and teens.Checklist Before Takeoff
Final Setup and Safety Review
Before each flight, run through a pre-launch checklist to ensure everyone’s safety. First, check the Aero 1 Lite’s battery level—it should be at minimum 80%. Next, confirm that the propellers and guards are secure. Use your fingers to gently test their rigidity. Inspect surroundings for children, pets, and bystanders. The pilot should be positioned behind the drone in a clear line of sight. Double-check the “Return to Home” altitude setting and recalibrate the compass if necessary. Finally, launch the app and verify that both the optical and GPS systems are functioning. With these checks completed, you’re ready for an enjoyable and safe flight session."With the Aero 1 Lite, we found the perfect way to bond, learn new skills, and explore the skies as a family." – Parent Review
Responsible Flying At Home and Outdoors
Regulations and Best Practices
The Aero 1 Lite setup isn't complete without understanding your responsibilities as a drone user. In the UK, for instance, all pilots flying drones over 250 grams must hold an Operator ID from the Civil Aviation Authority. Even though the Aero 1 Lite often falls below this threshold, it's wise to educate your teen on the importance of permissions and compliance. Follow the Dronecode: keep the drone within visual line of sight, under 120 metres altitude, and away from people and property. Flying near airports, national parks, or crowded events is strictly forbidden. These best practices ensure ethical flight experiences and help instil integrity in young pilots. For more details, review your nation’s aviation authority guidelines via Explore Aero 1 Lite features for kids. You can also use online drone maps like Local drone compliance essentials to check for restricted areas in real-time. Responsible habits today lead to a safe and long-lasting recreational flying career.Recommended Accessories
Enhance Your Setup for Better Results
Maximising your Aero 1 Lite setup is possible through compatible accessories. A sun hood for your smartphone screen can significantly improve visibility during outdoor flying sessions. Similarly, propeller upgrades with silicone-blade tips can improve stability and decrease noise. Extra battery packs are invaluable. We recommend purchasing an official charging hub to handle multiple batteries at once. Another worthy accessory is a reinforced drone case with water-resistant lining—for storage and transportation peace of mind. Also consider strobe lights if flying near dusk, enhancing visibility for both the pilot and onlookers. For trusted accessory kits, check options through the Aero 1 brand’s retail partners at Learn more about Beginner Drone Flying for Families. You can also read detailed comparisons and recommendations from drone experts at Read a related article.Join the Family Drone Community
Learn, Share, and Fly Better Together
Once your Aero 1 Lite setup is complete, consider engaging with the broader drone community. Family-friendly aviation forums and drone clubs offer guidance, reviews, and inspiration. These communities also provide help troubleshooting issues or refining flying techniques. Many teens thrive in these circles, channelling their creativity into aerial photography, mapping projects, or even competitive racing. Some groups host offline meetups where parent-teen teams can build new friendships while honing their skills. Contribution to these forums helps others while boosting your own understanding—drones represent not just technology, but a culture of exploration and collaboration.Final Thoughts On Your Drone Journey
Your aero 1 lite setup represents more than assembling a machine—it marks the beginning of a shared adventure. As families navigate the learning curve together, they develop skills in mechanics, responsibility, and cooperation. The Aero 1 Lite stands at the intersection of education and recreation, offering unmatched accessibility for newcomers of all ages. Remember to set time aside regularly for flight sessions, keep up with app updates, and always review safety checklists before takeoff. The wonders of flight await you—and now, you’re more than ready.Great guide on aero-1-lite-parent-teen-setup-guide – Community Feedback